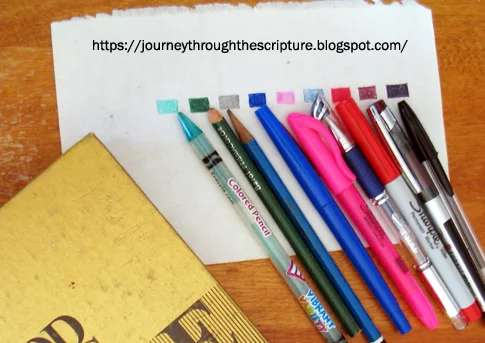
Before beginning, it is always advisable to test ones art supplies, whatever those may be. I also removed a blank page from an older Bible to conduct my simple research with, because I didn't want to use up any of the pages from my new Bible for the process.
Make sure that the page you are practicing on is similar to the pages found inside your Note Takers Bible. Modern Bible papers are very thin and are very particular in their substance. If you can find a Bible to use for the purpose of practice, share it with companions so that you don't end up destroying more books than you have to. I keep a Bible that is falling apart for this purpose alone so that my students don't need to abuse any of their own volumes in order to do their experiments.
 |
| Above you can see that I chose to test the pen and pencil types that I have in my own personal collections. If you are illuminating or illustrating texts in your Bible with paints: watercolor, acrylic etc... You should conduct a similar test for those supplies to see what the after effects will be. |
 |
| Above I have shown both the front and back pages on the left after using each pen or pencil type. This experiment helps me to see what the material will look like and how much "bleed through" the ink pens and pencils will leave on the flip side of the page. On the right, I have tested the sample with a Krylon acrylic coating to see if this chemical treatment would alter my materials. Remember, you should apply acrylic coating and/or fixative sealers to both the front and backside of pages after you have completed drawings. If you only treat the front of the page, the ink or pencil could still bleed on the backside if the page should get wet. I was somewhat surprised that the permanent ink was the only material to bleed, ironic. |


No comments:
Post a Comment
Note: Only a member of this blog may post a comment.